
Checklist: Winter Home Maintenance Must Dos
Winter can bring with it its own unique set of challenges for homeowners. From freezing temperatures to blizzards, the season can be a harsh one, and it’s essential to make sure your home is ready for the cold temperatures. By taking the time to winterize your home now, you can save yourself a lot of trouble down the line and keep your home safe from the elements.
From checking air filters to re-caulking window frames, there are many steps you must take to ensure your home stays warm throughout the winter season. In this article, we’ll provide a comprehensive checklist of all the necessary steps you should take to winterize your home. So read on and get ready for a comfortable and worry-free winter!
Protect/Insulate Your Pipe
One of the most important things you can do to winterize your home is to protect and insulate your pipes. This will help to prevent them from freezing and bursting during the cold winter months.
There are a few things you can do to protect your pipes from freezing during the winter. One is to insulate them with foam or tape. You can also wrap them in heat tape or pipe insulation. Another option is to keep your house warmer than usual, which will help prevent the pipes from freezing in the first place. Finally, if you know that a cold snap is coming, you can open all your faucets slightly so that water continues to flow and doesn’t have a chance to freeze solid in the pipes.
And If you plan on being away from home for an extended period of time, make sure to shut off the water supply to your home and drain all of the pipes.
Set Your Furnace (Check The Filter)
As the weather gets colder, you’ll want to make sure your furnace is in good working order. Start by checking the filter and replacing it if necessary. A clean filter will help your furnace run more efficiently and can prolong its life.
If your furnace has a pilot light, check that it’s lit. If not, consult your owner’s manual for instructions on how to relight it. Once the pilot light is lit, you can turn on your furnace by setting it to the “auto” position.
If your furnace has an electronic ignition, make sure the batteries in the thermostat are fresh so that it can properly signal the furnace to turn on.
Once your furnace is running, take a few minutes to walk around your home and check for any drafts. If you find any, seal them up with caulk or weatherstripping to keep warm air from escaping.
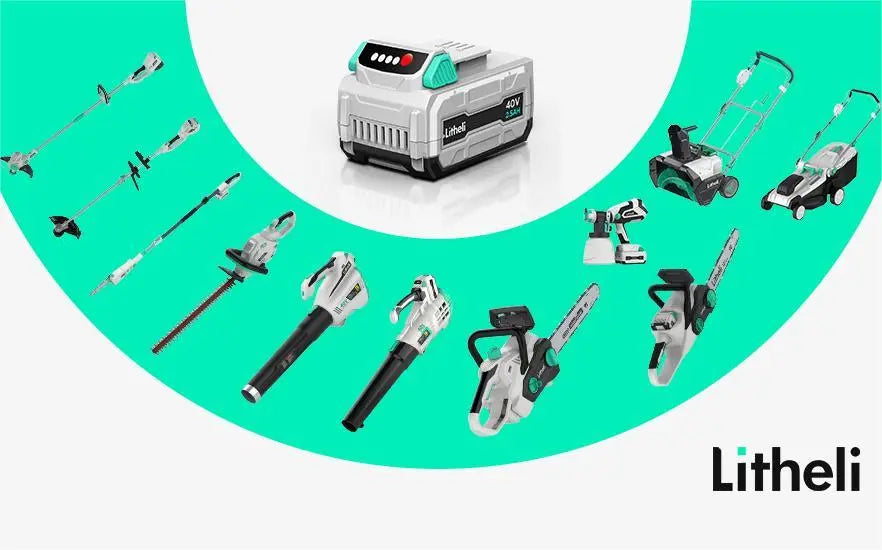
Battery Winterization
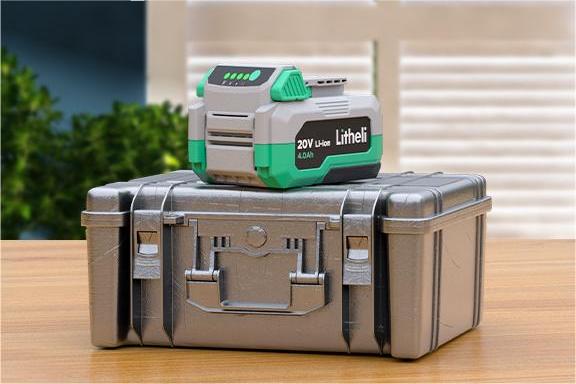
A high charge level and a safe storage is the food and shelter for the battery to cope with cold weather.
We prepare some useful tips for you:
- Charge the battery after & before use. High charge levels minimize chemical freezing.
- Start & preheat indoors before operating the tool outdoors.
- Let the battery stay ALONE after recharging to minimize parasitic loads.
- Clean & dry the battery thoroughly before storage, especially after use in snow.
Upgrade Your Thermostat
If your home is more than a few years old, chances are you don’t have a programmable thermostat. Upgrade to one of these, and you will not only tick one task off your home winterization checklist and make your home more comfortable but also save money on your energy bill.
There are a few things to consider when upgrading your thermostat. First, you’ll want to choose a thermostat that is compatible with your HVAC system. Next, decide if you want a programmable or non-programmable thermostat. Programmable thermostats can be set to turn on and off at specific times, which can save you money on your energy bills. Non-programmable thermostats are less expensive and easier to use, but they don’t offer the same level of energy savings.
Once you’ve decided which type of thermostat is right for you, it’s time to install it. Installation is usually pretty straightforward, but if you’re not comfortable doing it yourself, there are plenty of professionals who can help. Once your new thermostat is installed, take some time to learn how to use it so that you can get the most out of it during cold months.
Check Your Exterior
Inspect your roof and gutters for any damage or debris. Your gutters should be clear of leaves and other debris to allow proper drainage. Inspect your home’s exterior for any cracks or holes that need to be repaired. These can let in cold air and moisture, which can lead to costly repairs down the road. Check your windows and doors to make sure they are properly sealed and insulated. Windows and doors are major sources of heat loss in a home, so you want to make sure they are well-insulated.
You should also inspect your home’s siding for any damage or loose panels as siding can be damaged by severe weather conditions. Furthermore, inspect your home’s foundation for any cracks or damage. Foundation problems can be expensive to repair, so it is best to catch them early.
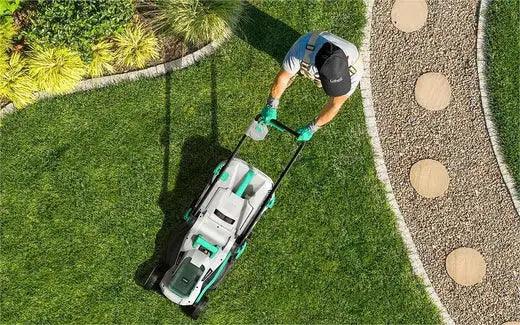
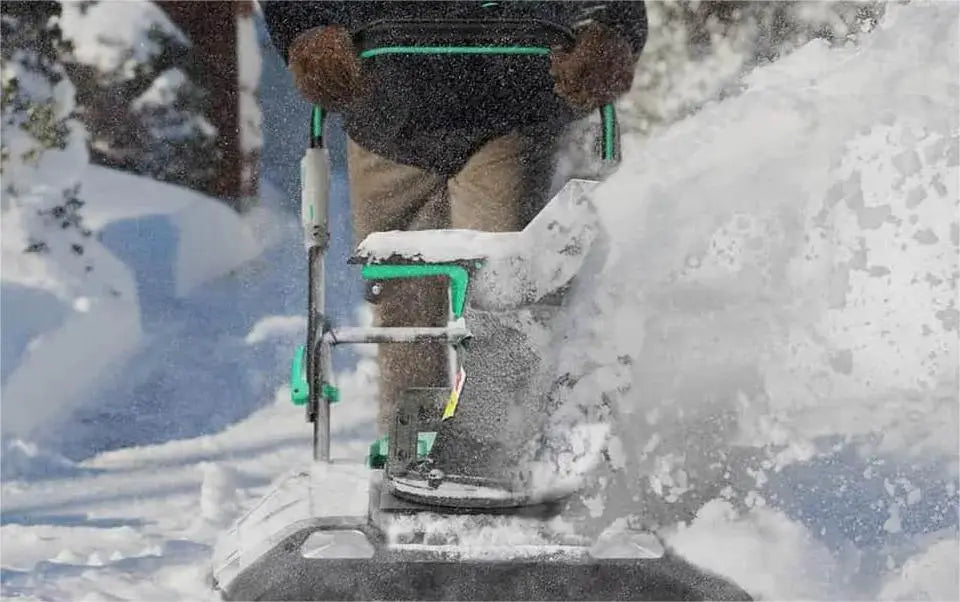
Have Your Snow Removal Tools Ready
When it comes to winterizing your home, being prepared means having the right tools on hand to deal with whatever Mother Nature throws your way. If you live in an area that gets snow, make sure you have a good snow shovel. A battery-powered one will do the job nicely and save more efforts than a manual one. Consider investing in the Litheli 20V Cordless Snow Shovel. With maximum mobility and swiftness, the highly efficient shovel throws snow up to 20 inches far and 8 inches high. When you have one, you will never have to worry about the obstacle snow poses on steps, decks, and slopes.
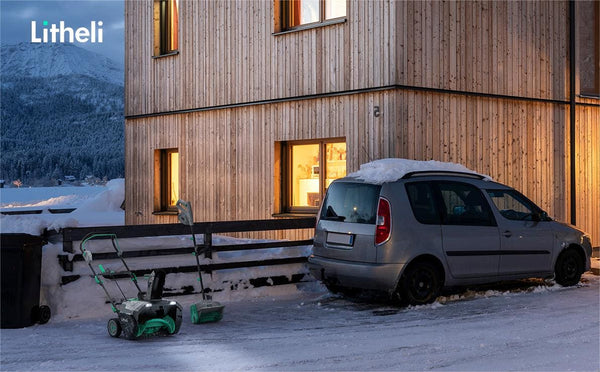
If you don’t have a lot of storage space, consider getting a small snow blower. This can save you a lot of time and backache when it comes to clearing driveways and sidewalks. As far as snow blowers are concerned, the Litheli 40V 20″ Cordless Snow Blower is an excellent option with its effortless removal of snow up to 20 inches wide and 12 inches deep. These tools come in foldable designs and do not take up much space.
Whatever winter weather tool you choose, make sure you go for one that is easy to use and easily mobile. That way, you’ll be ready for anything!
Inspect Your Roof For Any Damage
Your roof is one of the most important components of your home, and inspecting it regularly for any damage is crucial. If you live in an area with a lot of snowfall, it is especially important to clear your roof of any snow or ice buildup.
Be sure to inspect your roof for any missing or damaged shingles, and if you see any signs of leaks, be sure to have them repaired as soon as possible. It is also a good idea to have your chimney inspected and cleaned annually to prevent any blockages or buildup. Lastly, check around skylights, vents, and chimneys for any cracks or gaps. If you find any, seal them with caulk or weather stripping to prevent water from leaking into your home.
Maintain Your Water Heater
Your water heater is one of the most valued appliances in your home, so keeping it well-maintained should come naturally to you. Here are a few tips to help you keep your water heater in top condition:
- Check the temperature regularly. The ideal temperature for your water heater is between 120 and 140 degrees Fahrenheit. Adjust the temperature as needed to maintain this range.
- Drain and flush the tank regularly. Draining and flushing the tank helps remove sediment that can build up over time and cause problems with your water heater. Most experts recommend doing this once a year, but if you have hard water, you may need to do it more often.
- Inspect the anode rod regularly. The anode rod helps protect your water heater from corrosion, so you want to inspect it periodically and replace it if necessary. Many experts recommend replacing the anode rod every three to five years.
- Don’t forget about maintenance! In addition to the above tips, be sure to schedule regular maintenance for your water heater as recommended by the manufacturer. This will help ensure that your water heater runs smoothly and efficiently for years to come.
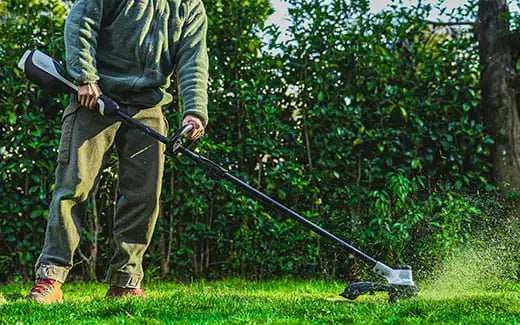
Trim Tree Limbs
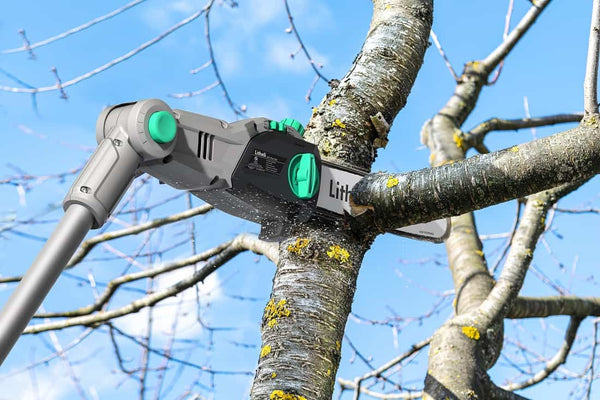
Make sure to trim any tree limbs that could potentially fall and damage your home or injure someone. Winter storms can cause even healthy trees to drop limbs, so it’s better to be safe than sorry. Follow these steps:
- Using a pole saw, cut the branch at a 45-degree angle away from the main trunk of the tree.
- Make sure that the cut is about 2 feet away from the main trunk of the tree.
- Once you have trimmed all of the branches that you want to, use a hose or pressure washer to clean off any loose bark or leaves.
Usually, to reach the branches you want to trim, you need a ladder. You can avoid the stress of looking for one or, even worse, the risk of falling by opting for one of Litheli’s pole saw offerings. With any of those, you can reach up high to trim your trees while standing firm on the ground. The safety and convenient cutting these saws offer, along with their higher flexible reach, is more than enough reason to abandon your old saw and purchase one.
Switch Ceiling Fans to Clockwise
Another way you can winterize your home in the cold months is by switching your ceiling fans to rotate clockwise. This will push warm air near the ceiling down into the living space. This simple change will help circulate warm air near the ceiling down into the room, making it feel warmer and saving you money on your heating bill.
To switch your ceiling fan direction for maximum efficiency, take the first step of turning off the power to the ceiling fan at the breaker box. Next, locate the small switch on the side of the motor housing. This switch controls the direction of rotation. Flip it to the “clockwise” position.
Finally, turn the power back on at the breaker box and test out your newly rotated fan!
Protect Your Windows
When it comes to preparing your home for winter, one of the best things you can do for your home – and yourself – is protect your windows. Here are a few tips to help you get started:
- Install storm windows or cover your existing windows with plastic. This will help insulate your home and keep out drafts.
- Caulking and weatherstripping around your windows will also help seal out drafts.
- If you have old, single-pane windows, consider replacing them with newer, more energy-efficient models.
Bonus Tip: Put Together a Winter Emergency Kit
When the weather outside is frightful, you need to be prepared in case of an emergency. Putting together a winter emergency kit now will help you be prepared for whatever winter throws your way.
Your winter emergency kit should include items like:
- A flashlight and extra batteries
- A first-aid kit
- A supply of non-perishable food and water
- Warm clothing and blankets
- A working smoke detector and carbon monoxide detector
- Sand or salt to help with traction if you need to leave your home in icy conditions
- A shovel for clearing snow
- A battery-operated radio to stay informed about weather and other emergencies
- Candles and matches in case you lose power.
Conclusion
By following these simple tips, you can winterize your home and avoid expensive repairs down the road. So don’t wait until the first snowfall to get started — use this winter home maintenance checklist today!